PDF · C# walkthrough
A PDF dispatch note
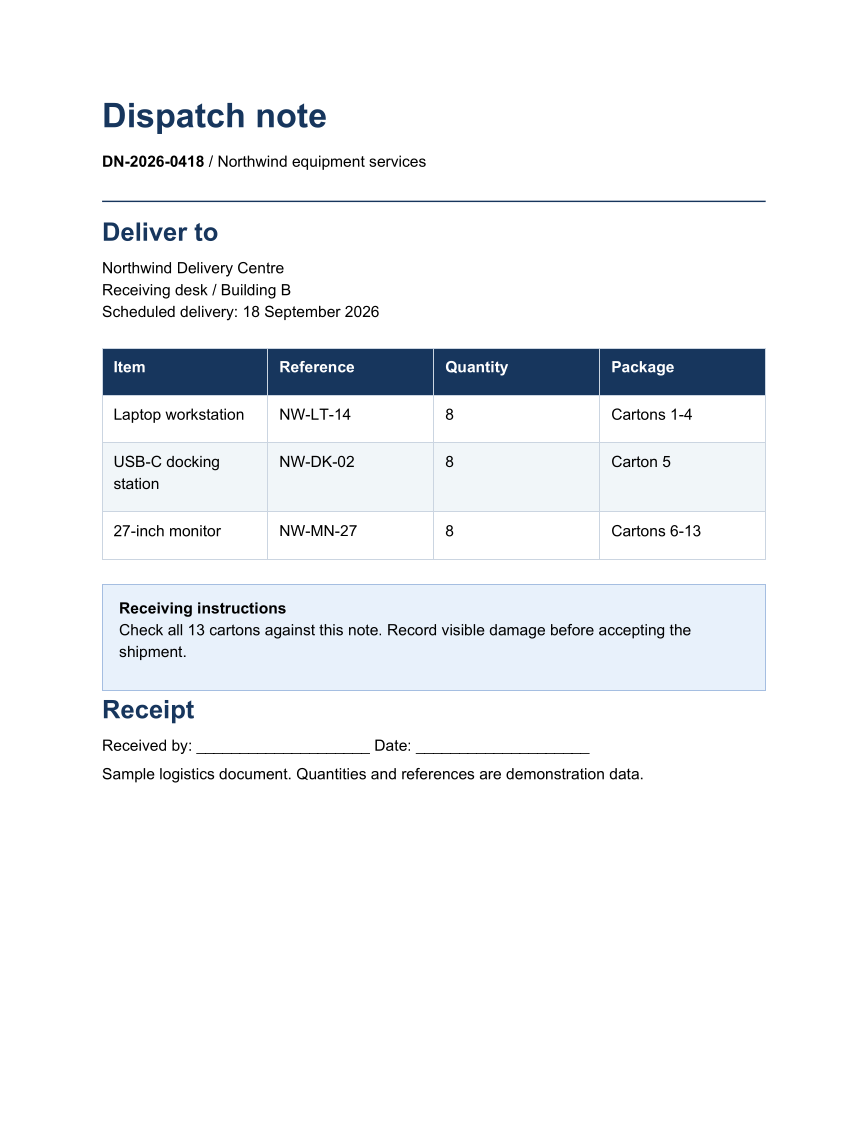
Generate a shareable dispatch note from logistics data. The document puts the recipient, quantities, packaging references, and receiving instructions in one printable layout.
- Start with
- Shipment reference, item rows, and receiving instructions
- Generate
How it works
Define the table appearance
Use a table style with a colored header, alternating row fill, and enough cell padding for item descriptions.
Compose the shipment record
Add the reference and delivery details before the item table, keeping the document easy to check during receipt.
Highlight the receiving instructions
Put the delivery note in a panel, then leave a simple receipt area and add PDF title metadata.
The C# source
This is the complete example file used to generate the download. The walkthrough runner creates the output directory and produces the additional previews.
using System.IO;
using OfficeIMO.Pdf;

namespace OfficeIMO.Examples.Showcase.Workflows;

/// <summary>Creates a dispatch note with shipment details, item rows, and delivery instructions.</summary>
internal static class DispatchNote {
    internal static void Create(string folder) {
        PdfColor navy = PdfColor.FromRgb(23, 54, 93);
        var tableStyle = new PdfTableStyle {
            HeaderFill = navy, HeaderTextColor = PdfColor.White, HeaderRowCount = 1,
            RowStripeFill = PdfColor.FromRgb(241, 245, 249),
            BorderColor = PdfColor.FromRgb(203, 213, 225), BorderWidth = 0.5,
            CellPaddingX = 8, CellPaddingY = 9, SpacingBefore = 10, SpacingAfter = 18
        };
        string[][] items = {
            new[] { "Item", "Reference", "Quantity", "Package" },
            new[] { "Laptop workstation", "NW-LT-14", "8", "Cartons 1-4" },
            new[] { "USB-C docking station", "NW-DK-02", "8", "Carton 5" },
            new[] { "27-inch monitor", "NW-MN-27", "8", "Cartons 6-13" }
        };
        PdfDocument.Create(pdf => pdf.Content(content => content
            .H1("Dispatch note", PdfAlign.Left, navy)
            .Paragraph(p => p.Bold("DN-2026-0418").Text(" / Northwind equipment services"))
            .HR(1, navy, 12, 14)
            .H2("Deliver to", PdfAlign.Left, navy)
            .Paragraph(p => p.Text("Northwind Delivery Centre\nReceiving desk / Building B\nScheduled delivery: 18 September 2026"))
            .Table(items, style: tableStyle)
            .PanelParagraph(p => p.Bold("Receiving instructions\n").Text(
                "Check all 13 cartons against this note. Record visible damage before accepting the shipment."),
                new PdfPanelStyle {
                    Background = PdfColor.FromRgb(232, 241, 251),
                    BorderColor = PdfColor.FromRgb(165, 190, 225), PaddingX = 12, PaddingY = 12
                })
            .H2("Receipt", PdfAlign.Left, navy)
            .Paragraph(p => p.Text("Received by: ____________________     Date: ____________________"))
            .Paragraph(p => p.Text("Sample logistics document. Quantities and references are demonstration data."))),
            new PdfOptions { DefaultFontSize = 11 })
            .Meta(title: "Dispatch note DN-2026-0418", author: "OfficeIMO")
            .Save(Path.Combine(folder, "example.pdf"));
    }
}
Run it from the source checkout
Clone the OfficeIMO repository and run this command from its root with the .NET 10 SDK. The first run restores the example project's dependencies.
dotnet run --project OfficeIMO.Examples -f net10.0 -- --showcase-workflows --showcase-example pdf-dispatch-noteThe files are written to OfficeIMO.Examples/bin/Debug/net10.0/Documents/Workflows/pdf-dispatch-note/. To use the example in your application, start with the PDF guide and its package setup.
Downloads and scope
What the preview shows
The linked C# example generates this file. The page images are rendered from the downloadable PDF with Poppler.
What to keep in mind
The receipt area is printed text, not an interactive form or digital signature field. Sample data does not represent a real shipment.